Process and another batch
Okay, people were interested in the last weird crafty thing I posted here, so I’ll keep up the trend. Crossposting to
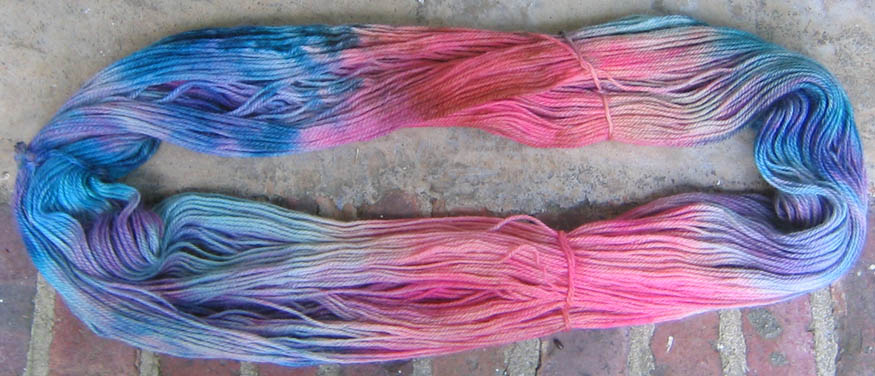
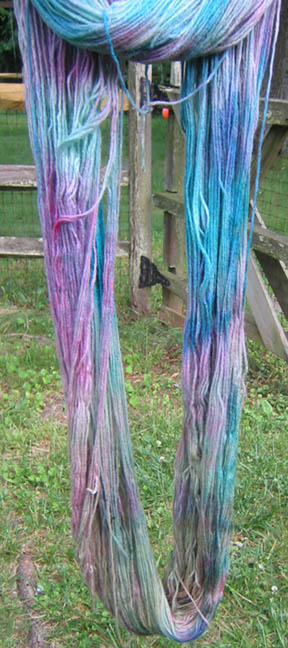
Here’s another attempt at dyeing yarn with Wilton’s icing dyes. Same colors on the ends as before – cornflower blue and delphinium blue – but this time rose pink in the middle. It’s a bit bright, and reminds me of all the bicentennial stuff that came out when I was a kid in ’76. This marks the second batch of yarn I’ve dyed and then said, “Okay, now what the hell am I going to do with it?”
I posted about dyeing my first batch in this post and thought I’d show the process of dyeing it. This will be old hat to you experienced hands, but those of us who are still scrabbling for a clue may enjoy it. 🙂
Because I didn’t know much about dyeing the first batch, I was very nervous. The thing that was most helpful to me was specific pictures of the process. So, with that in mind, I took pics when I did my first batch.
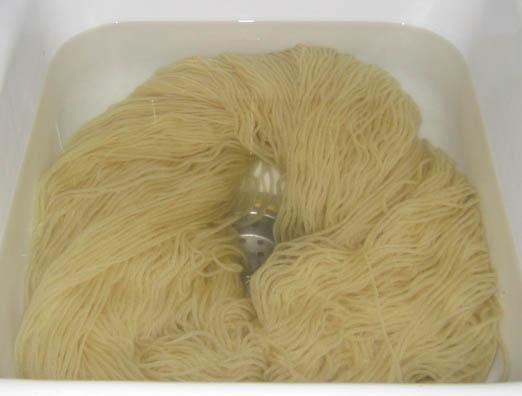
I started soaking my yarn, a full skein of Fisherman’s Wool, in a huge bowl, but the yarn soaked up vastly more water than I thought it would. There was no way I was going to be able to keep it wet. So I transferred it to the sink. My husband kept thinking I was rinsing spaghetti in some new, weird way. It soaked overnight, with me occasionally pushing it down underwater to get rid of bubbles.
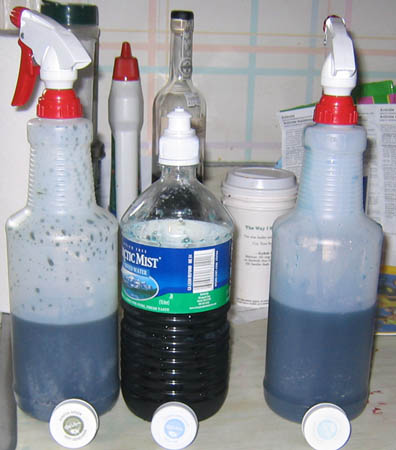
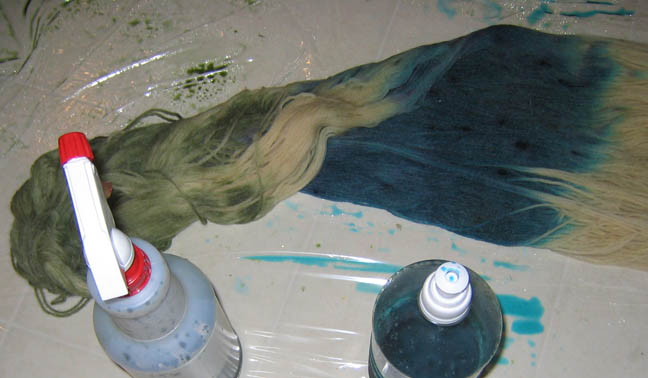
This is my prepared dye, which is 1/2 teaspoon of Wilton’s icing dyes, 2 cups of water, and 1/3 cup of vinegar. Colors are Willow Green, Cornflower Blue, and Delphinium Blue.
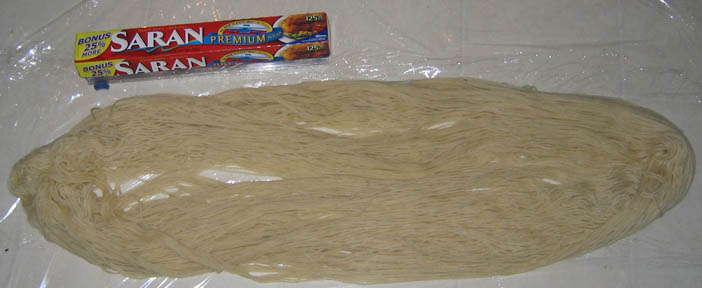
I’ve laid out Saran wrap on the floor. This is the second pair of sheets I laid out, as the first pair was too short, so I had to kind of slop the yarn onto more Saran wrap.
Applying the dye! I’ve half-turned the yarn here so you can see that the spray bottle wasn’t penetrating nearly enough. That’s actually after I had mushed it through with my hands some. I wound up removing the top of the spray bottle and pouring the dye on. Bits of dye did get around the edges the plastic wrap, but came up easily off of the linoleum with a sponge. You can also see darker specks in the blue, which I assume are places where the dye didn’t mix well enough in the bottle. My mixing technique? “Shake vigorously.”
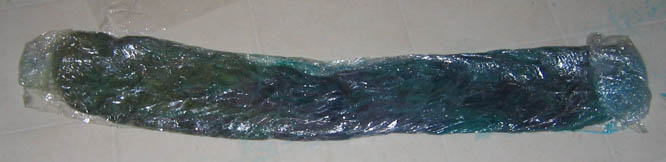
The yarn is all wrapped up in a Saran wrap sausage. Small pools of dye are floating around in the plastic wrap, but since I’m not going for a uniform color, I decide it won’t matter. I think I may have already detected a slight purplish tinge around the middle section at this point in the dyeing process.
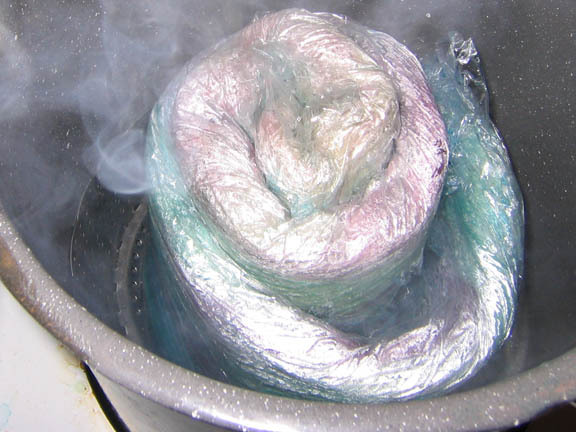
I have a steamer inside my spaghetti pot, and some water bubbling. I lay the yarn roll on the steamer and close the lid. After I while, I notice… what’s that smell? I swear, it smells like burning plastic. Is there still water in there? I can’t tell because the pot is so deep and the yarn roll obscures my vision. Turns out that yes, the water DID boil away, and my pot is now ruined for spaghetti since some of the enamel wore through. The plastic smell was a small plastic portion of my steamer beginning to melt. Great.
On the up side, the yarn looks nice, although the purple color was very unexpected. You can see the purple color and the smoke (not steam) in this picture. I did add water after this. For the second batch of yarn I did, I took a mini loaf pan and put it in the bottom of the pot under the steamer so that I could add plenty of water. There was no repeat of that problem.
After somewhere between 20 and 40 minutes – sorry, I honestly don’t remember – I turned off the heat and let it slowly cool. After a few hours, I took it out. It was still quite warm in the middle. The dye which had been inside the plastic was clear, although some of the water in the pot was bluish. Putting it in the sink to rinse, I was pleased to see that there was no color bleeding at all. And that purple! Very unexpected.
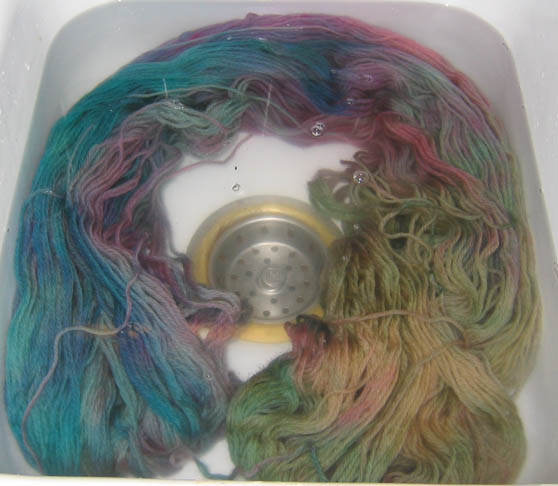
After gently pushing it through the water for a bit, I take it outside to dry. It was still drying several hours later when it got dark, so I took it in. It’s moth season here. I didn’t want to take any chances.
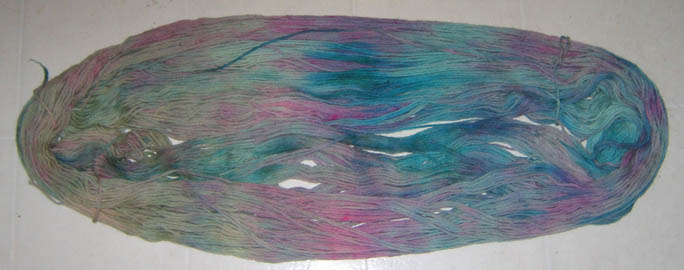
The finished product. Not at all what I thought it was going to be, but definitely a fun experience. No clue what I’m going to do with 465 yards of this, but at least I learned a lot!
I don’t know if this will help any other newbies, but I present it anyway. Thanks for reading!