Felting soap tutorial
I’m participating in a swap called Jar o’ Joy. One of the items I put into the jar was a bar of felted soap. This is a really nifty project, and now that the jar has reached its recipient, I can show pics of the soap and how it was made.
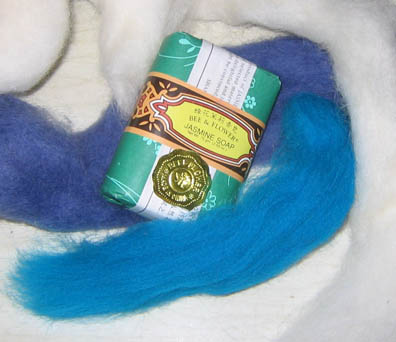
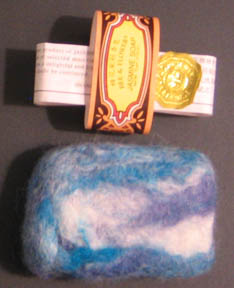
Materials needed: soap (I used Bee and Flower because it’s small and fragrant, but any soap will work) and wool roving. If you’ve got a yarn store near you, you can probably find little fibertrends felting kits, those are a good source of small quantities of roving. Also, you’ll need hot water, cold water, and something rough to rub against. I use a washboard, but you could also use a sushi mat or other bumpy surface, anything that will help your fibers rub together. If you don’t have something rough, that’s okay, it will still work, albeit a little more slowly. You’ll be rubbing it with your hands anyway.
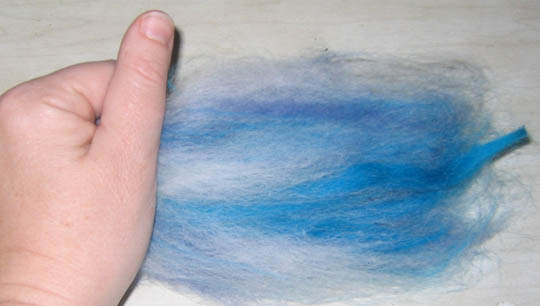
I decided I didn’t want to do wide bands of color, but instead to go for more of a blend. Since I don’t have a fiber comb or cards, I used my hands to do the blending. I laid my fibers on top of each other, lined up in the same direction, and pulled. Then I took my two bundles of fiber, laid them atop each other again, and pulled. In this way I fluffed my fibers while blending the colors.
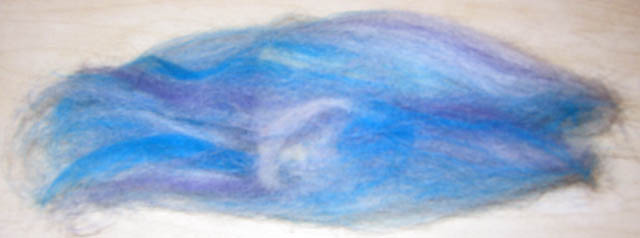
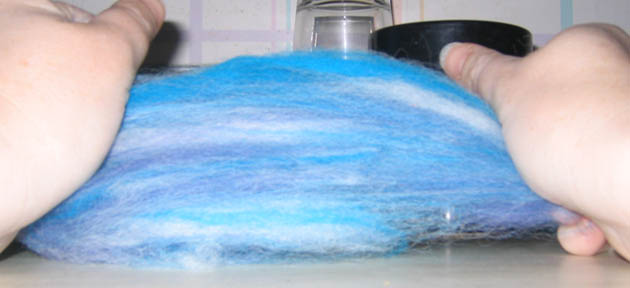
I made sure I had enough fibers to cover twice the length of the soap, since I’ll be encasing the bar completely. This is the bar lightly wrapped, so I can see what kind of coverage I’m getting. After this pic, I actually took another piece of white and one of blue and made another layer inside the fibers you see here. I don’t want bits of my soap poking out of thin places.
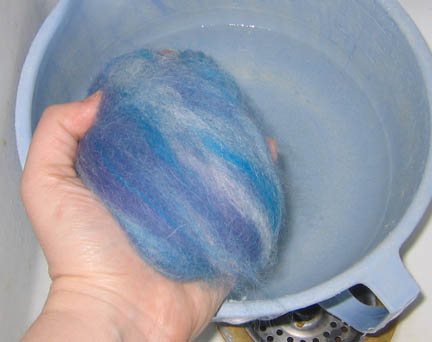
Here it is, all wrapped up. The bowl contains very hot tap water. My hands can take a lot of heat, but if you’re of a more delicate constitution, consider gloves or lower the temp a little and take your time. At this point, I’m going to drizzle some water onto the soap and gently rub. If I just dunk it in dry, the fibers may slough off of the soap.
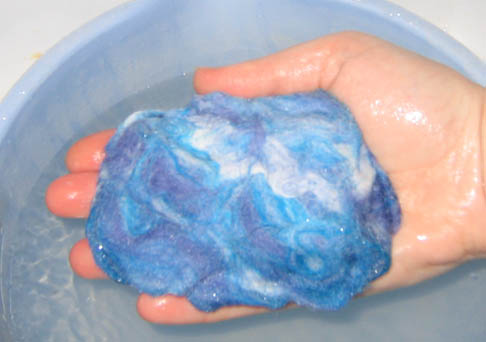
The wetted soap. You can see it’s slumping some. That’s okay. I’m gently rubbing it with my hands to help the fibers lock together, turning it to help reduce the slumping.
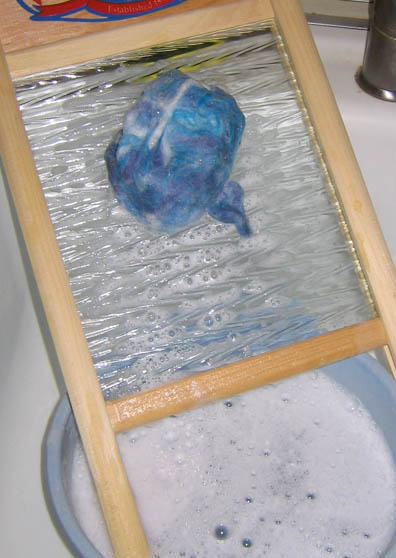
Introducing another method of rubbing the fibers. It’s really sudsing up. Note the bit that’s coming off of the end. That’s because I got it wet a little too fast and didn’t pat that bit back into the fibers to encourage it to hold onto the larger mass. I’ll pull that part off now and no one will ever know.
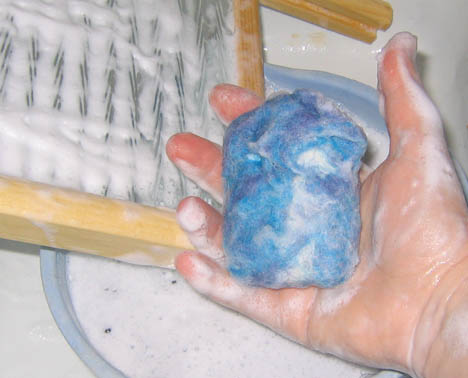
It’s really quite soapy now! That’s good – the thing I like about felted soap is that it lathers beautifully, but you don’t waste a lot of soap. At this point, I’ve run it under some cold water to shock the fibers. Then I dunked it back into the hot and rubbed it some more like I was washing my hands. Then more cold, then more hot, then more cold. You can see the slumping is gone, and the fibers are really making a good soap shape.
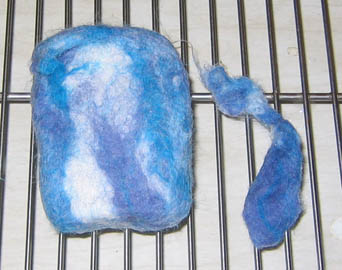
And that’s good enough! There’s a little bit of folding over of fibers where it’s not perfectly square, but this is an art, and I expect some imperfections. The piece of fiber next to the soap is the bit that got pulled off earlier. I’ve squeezed all the water I can out of the soap and have put it on a drying rack.
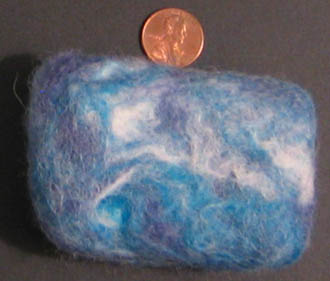
This is several hours later. There’s still just a touch of dampness, but it’s pretty much done. It’s a good idea to squeeze the water out of your soap after using it, just as you’d squeeze out a washcloth.
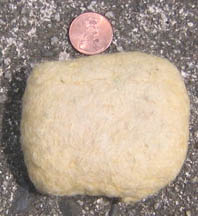
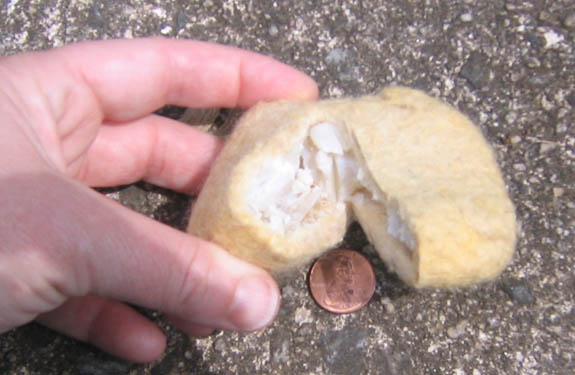
This is a bar of soap that’s about four months old. It’s not that pretty, just yellow roving, but it worked like a charm. It felt like there was nothing left inside, although it still foamed up great, so I cut it open to see what it looked like. As you can see, there’s still soap in there, albeit crumbled, and there’s no mold or other nastiness.
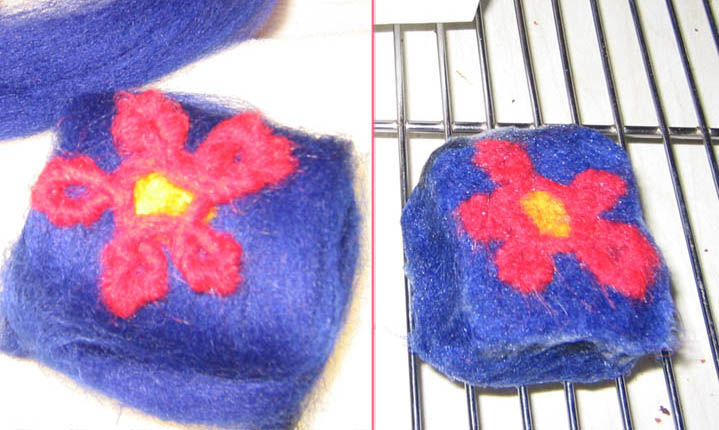
There are a lot of things you can do with these. In the picture at left, I needle-felted a design onto the roving using Lamb’s Pride bulky before wrapping the soap, then was careful not to disturb the design too much when wet-felting. You can see it prior to felting and post-felting.
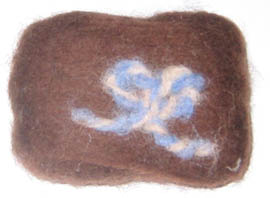
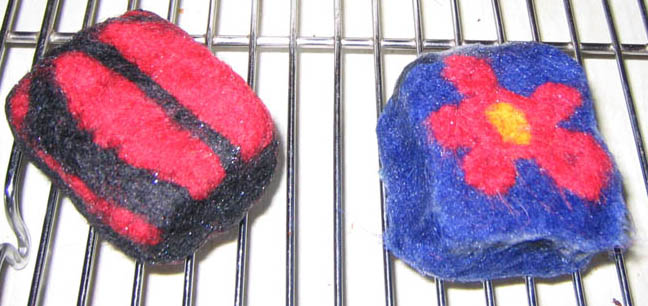
Here are a couple of other examples. One is two pieces of handspun twisted together, then needle-felted into a little bow on the roving, then wet-felted as above. The red and black is red roving with a strip of black roving around the ends and other strips of black roving.
I love this technique. The wool exfoliates nicely, and it lasts a long, long time so you get a good bang for your buck from your favorite soap. I hope you’ll give it a try – it’s fun!